kenteer

Choosing the Right UV Printer: Price Comparison and Features Analysis

When choosing the right UV printer, it's essential to consider both price and features to ensure it meets your specific needs. Here's a guide to help you with price comparison and features analysis:

UV Printer

1. Determine Your Budget:
- Start by establishing a budget for your UV printer. This will help you narrow down your options and focus on models within your price range.

2. Compare Prices:
- Research different UV printer models from various manufacturers and compare their prices. Keep in mind that the price can vary depending on factors such as size, print quality, production speed, and additional features.

3. Consider Print Size and Resolution:
- Evaluate the maximum print size and resolution capabilities of the UV printers you are considering. Determine if they can accommodate the sizes and level of detail required for your specific printing applications.

4. Assess Production Speed:
- Review the production speed specifications of the UV printers. Consider the volume of printing you anticipate and choose a printer that can meet your production requirements without compromising print quality.

5. Examine Ink Options:
- Look into the types of ink supported by the UV printers. Consider factors such as ink cost, color gamut, and compatibility with different materials (e.g., rigid substrates, flexible media). Determine which ink option suits your printing needs and budget.

6. Evaluate Print Quality:
- Look for sample prints or demonstrations from the UV printer models you are considering. Assess the print quality, color accuracy, sharpness, and fine detail reproduction. Ensure that the printer can deliver the level of quality you require for your specific applications.

7. Additional Features:
- Consider any additional features or functionalities that may be important to you. This could include options like dual-layer printing, varnish or texture effects, automated calibration, or advanced color management. Evaluate if these features align with your printing requirements and if they justify any additional cost.

8. Warranty and Support:
- Check the warranty coverage and support options provided by the manufacturer. A reliable warranty and access to technical support can be crucial in case of any issues or maintenance needs.

9. Reviews and Reputation:
- Read customer reviews and seek feedback from other UV printer users. Consider the reputation of the manufacturer and their track record for product reliability, customer service, and ongoing software updates.

By comparing prices and analyzing the features of different UV printers, you can make an informed decision based on your budget and specific printing requirements. It's recommended to reach out to manufacturers or authorized resellers directly to get detailed quotes and specifications that align with your needs.

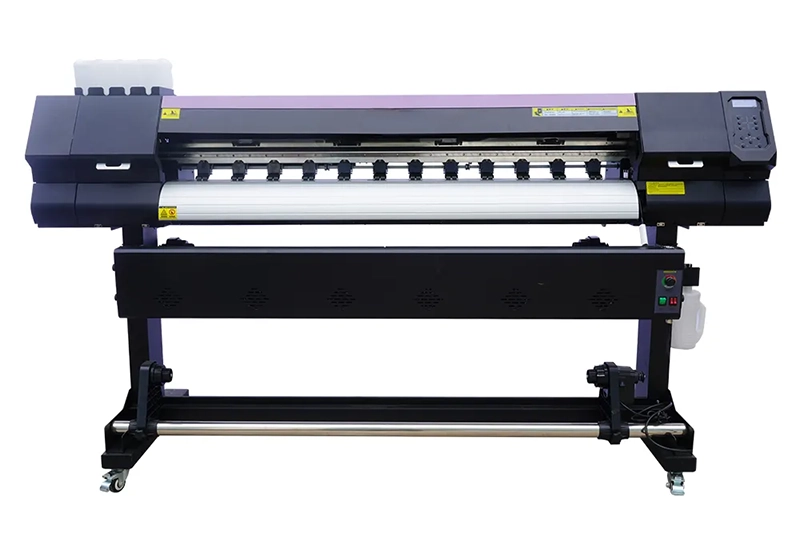
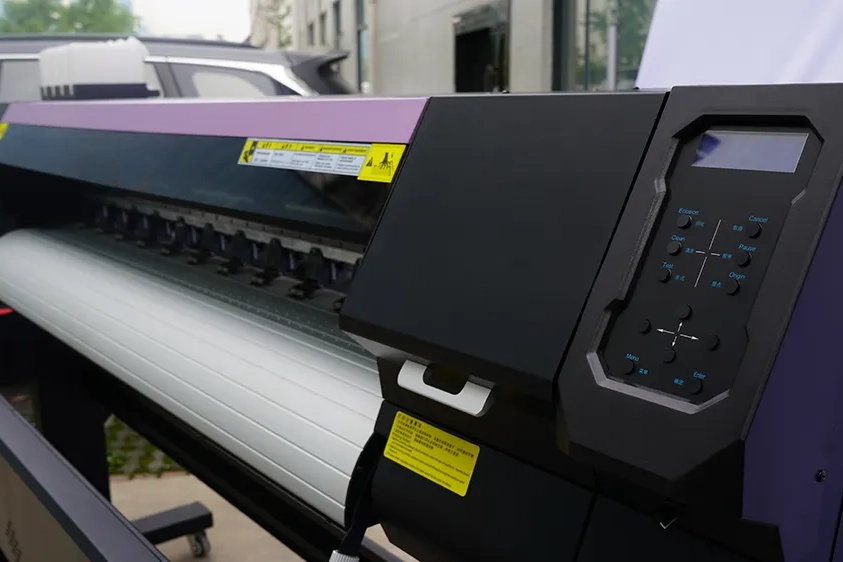
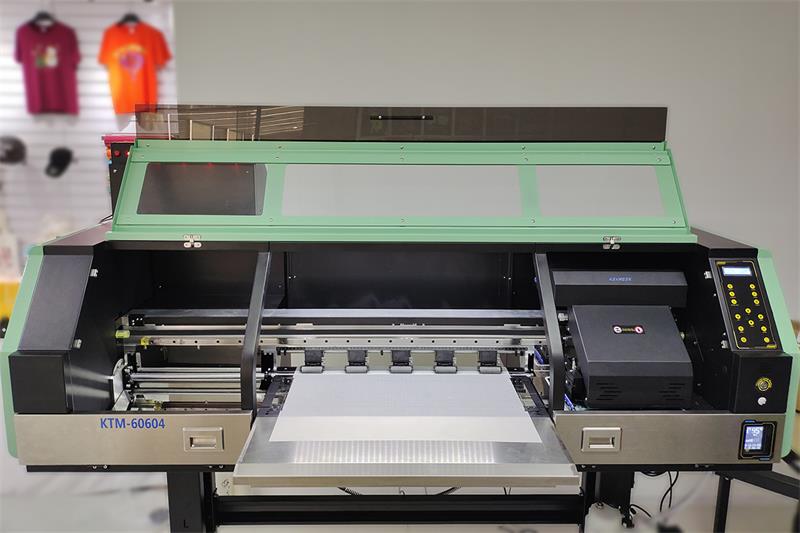
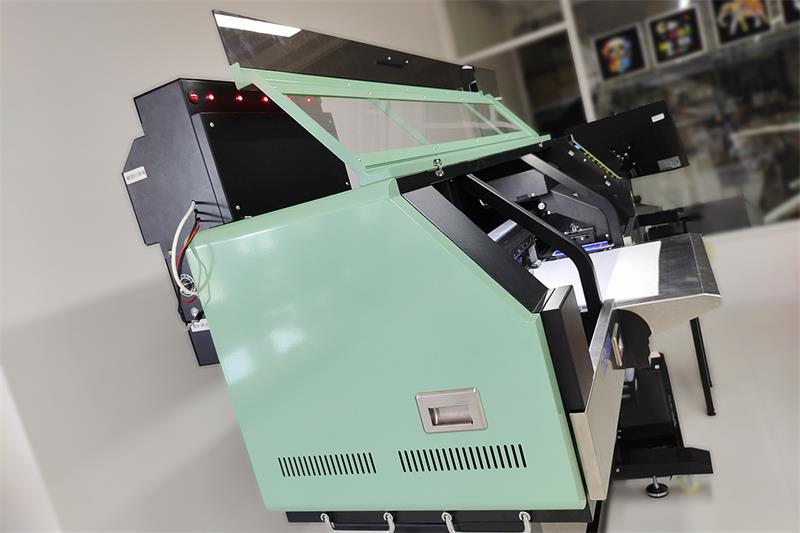
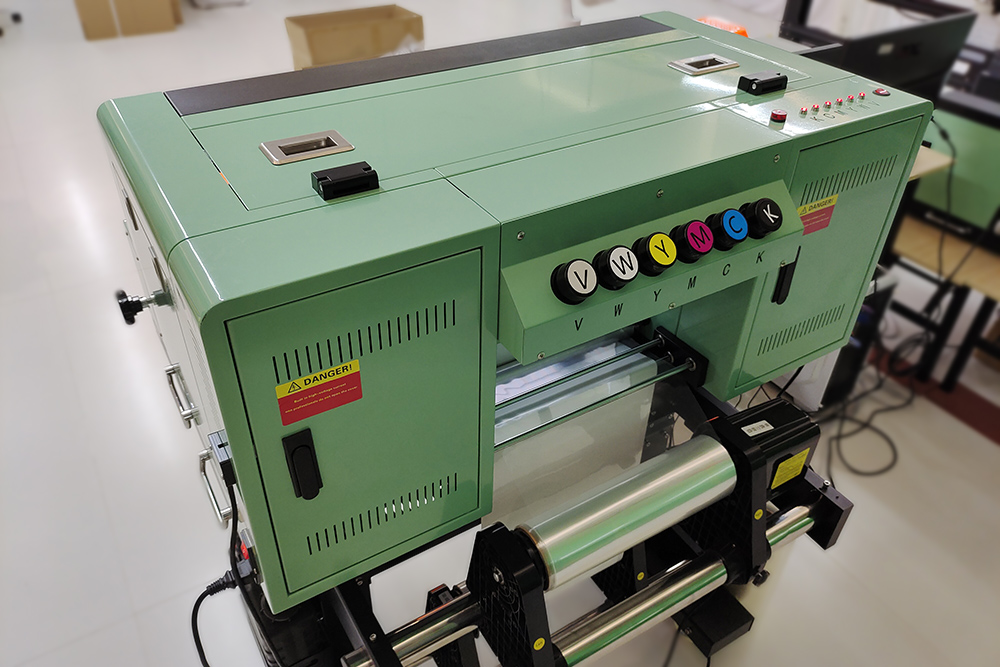
kenteer has launched DTF UV printers for customers . If you have any needs, you can contact us for a quote.

DTF Smoke Remover Not Adjusting Smoke Sensitivity: Troubleshooting and Solutions for Sensitivity Control Problems

When facing issues with a DTF smoke remover not adjusting smoke sensitivity, preventing proper control of smoke levels, there are several troubleshooting steps you can take to address the problem. Here's a guide to help you:

DTF Smoke Remover

1. Check Power and Connections:
- Ensure the smoke remover is properly connected to a power source and that the power switch is turned on. Make sure the power cord is securely plugged in and not damaged. Verify that the outlet is functioning correctly by connecting another device.

2. Sensitivity Control Setting:
- Review the user manual or manufacturer's documentation to understand how the sensitivity control works and how to adjust it properly. Follow the recommended steps to set the sensitivity at the desired level.

3. Clean the Sensor:
- Dust, debris, or residue on the smoke sensor can interfere with its sensitivity. Use a soft, lint-free cloth or a gentle cleaning solution recommended by the manufacturer to clean the sensor according to their guidelines. Be cautious not to damage or scratch the sensor.

4. Sensor Placement:
- Ensure that the sensor is positioned correctly and in proximity to the area where smoke is expected to be detected. Check if there are any obstructions or objects obstructing the sensor's view. Adjust the positioning if necessary and verify if it improves sensitivity control.

5. Calibration:
- Some smoke removers have a calibration process that helps set the sensitivity accurately. Consult the user manual or manufacturer's instructions to understand if calibration is required and how to perform it correctly. Follow the recommended steps to calibrate the device.

6. Firmware or Software Updates:
- Check if there are any available firmware or software updates for the smoke remover. Outdated firmware or software can cause sensitivity control issues. Visit the manufacturer's website or contact their support for information on updates and instructions for installing them.

7. Test with Different Smoke Sources:
- Experiment with different smoke sources to verify if the sensitivity control is functioning properly. Use appropriate smoke testing methods or substances recommended by the manufacturer. This can help determine if the issue is specific to certain smoke sources or if there is a broader sensitivity control problem.

8. Contact Manufacturer's Support:
- If the above troubleshooting steps do not resolve the sensitivity control problem, it is advisable to contact the manufacturer's technical support for further assistance. They can provide specific guidance based on the model and make of the smoke remover or arrange for a service technician to diagnose and repair the device if needed.

It's essential to follow the manufacturer's instructions and guidelines for troubleshooting and maintenance specific to your DTF smoke remover model.

kenteer has launched DTF Smoke Remover for customers . If you have any needs, you can contact us for a quote.

DTF Smoke Remover Not Turning On: Troubleshooting and Solutions

When encountering issues with a DTF smoke remover not turning on, there are several troubleshooting steps you can take to address the problem. Here's a guide to help you:

DTF Smoke Remover

1. Power Supply:
- Ensure that the smoke remover is properly connected to a power source and that the power switch is turned on. Check the power cord for any damage or loose connections. Try plugging the smoke remover into a different power outlet to rule out any issues with the power source.

2. Circuit Breaker or Fuse:
- Check the circuit breaker or fuse that supplies power to the smoke remover. If the circuit breaker is tripped or the fuse is blown, reset or replace it accordingly. This can help restore power to the smoke remover.

3. Control Panel and Settings:
- Examine the control panel or interface of the smoke remover. Ensure that the settings are correct and that the device is not in standby or sleep mode. Adjust the settings as needed to activate the smoke remover.

4. Safety Interlocks:
- Some smoke removers have safety interlock mechanisms to prevent operation if certain conditions are not met. Check if there are any safety switches or interlocks that need to be engaged for the smoke remover to turn on. For example, there may be a door or cover that needs to be properly closed and latched.

5. Faulty Power Switch or Control Board:
- If none of the above steps resolve the issue, there may be a problem with the power switch or control board of the smoke remover. Contact the manufacturer's technical support for further assistance. They can provide specific troubleshooting steps or arrange for a service technician to diagnose and repair the smoke remover if needed.

6. Power Reset:
- Perform a power reset of the smoke remover. Turn off the power switch and unplug the device from the power source. Wait for a few minutes, then plug it back in and turn on the power switch. This can sometimes resolve temporary power-related issues.

7. Check Power Indicator Lights:
- If the smoke remover has power indicator lights, check if they are illuminated when the device is plugged in and turned on. If the lights are not working, it could indicate a power supply or internal component issue. Consult the manufacturer's documentation or contact their support for further guidance.

It's important to note that the specific troubleshooting steps may vary depending on the make and model of the DTF smoke remover. Always refer to the user manual and follow the manufacturer's instructions for troubleshooting and maintenance.

kenteer has launched DTF Smoke Remover for customers . If you have any needs, you can contact us for a quote.

Troubleshooting Powder Shaker Overheating: Resolving Motor and Electrical Issues

When dealing with a powder shaker that is overheating, it is crucial to troubleshoot and resolve motor and electrical issues promptly. Here's a guide to help you address these problems:

Powder Shaker

1. Check the Environment:
- Ensure that the powder shaker is operating in a well-ventilated area. Adequate airflow helps dissipate heat and prevents overheating. Remove any obstructions around the shaker that may impede proper ventilation.

2. Motor Inspection:
- Inspect the motor for any signs of damage or malfunction. Look for loose wires, frayed cables, or worn-out components. If any issues are found, consult the manufacturer's documentation or contact their support for guidance on repairing or replacing the motor.

3. Motor Lubrication:
- Check if the motor requires lubrication. Some powder shakers have specific lubrication requirements for the motor. Refer to the user manual or manufacturer's recommendations for the appropriate lubricant and instructions on how to apply it correctly.

4. Voltage and Power Supply:
- Verify that the powder shaker is receiving the correct voltage and power supply within its specified range. An underpowered or overpowered supply can cause the motor to overheat. If necessary, consult an electrician to ensure the power supply matches the shaker's requirements.

5. Electrical Connections:
- Check all electrical connections, including power cords, plugs, and terminals. Ensure they are secure and free from damage or loose connections. Faulty or loose connections can lead to increased resistance and overheating. Tighten or repair any damaged connections as necessary.

6. Control Panel and Settings:
- Review the control panel settings of the powder shaker. Check if there are any settings that may be causing excessive motor operation or heat generation. Adjust the settings as needed, ensuring they are within the recommended ranges specified by the manufacturer.

7. Overload Protection:
- Some powder shakers may have built-in overload protection mechanisms. If the motor is consistently overheating, it could be due to an overload condition. Refer to the user manual or contact the manufacturer for guidance on adjusting or troubleshooting the overload protection settings.

8. Regular Maintenance:
- Follow the manufacturer's recommended maintenance schedule for the powder shaker. Regularly clean and inspect the shaker for any accumulated powder, debris, or obstructions that could impede motor operation or airflow. Clean or remove any obstructions as needed.

Powder Shaker

If the troubleshooting steps mentioned above do not resolve the overheating issue with the powder shaker, it is recommended to contact the manufacturer's technical support for further assistance. They can provide specific troubleshooting steps based on the model and make of the powder shaker or arrange for a service technician to diagnose and repair the problem.

kenteer has launched DTF Powder Shaker for customers . If you have any needs, you can contact us for a quote.

Powder Shaker Not Turning On: Troubleshooting and Solutions

When encountering issues with a powder shaker not turning on, there are several troubleshooting steps you can take to address the problem. Here's a guide to help you:

Powder Shaker

1. Power Supply:
- Ensure that the power supply is properly connected to the powder shaker and that the power switch is turned on. Check the power cord for any damage or loose connections. Try plugging the powder shaker into a different power outlet to rule out any issues with the power source.

2. Circuit Breaker or Fuse:
- Check the circuit breaker or fuse that supplies power to the powder shaker. If the circuit breaker is tripped or the fuse is blown, reset or replace it accordingly. This can help restore power to the shaker.

3. Control Panel and Settings:
- Examine the control panel or interface of the powder shaker. Ensure that the settings are correct and that the shaker is not in a standby or sleep mode. Adjust the settings as needed to activate the shaker.

4. Safety Interlocks:
- Some powder shakers have safety interlock mechanisms to prevent operation if certain conditions are not met. Check if there are any safety switches or interlocks that need to be engaged for the shaker to turn on. For example, there may be a door or cover that needs to be properly closed and latched.

5. Powder Level Sensor:
- If your powder shaker has a powder level sensor, ensure that it is not obstructed or malfunctioning. Clean the sensor or remove any blockages that may be preventing it from detecting the powder level properly.

6. Motor or Mechanical Issues:
- Check if there are any mechanical issues with the motor or other moving parts of the powder shaker. Inspect for any signs of damage, loose connections, or worn-out components. If you suspect a mechanical issue, it may require professional assistance or a service technician to repair or replace the faulty parts.

7. User Manual and Manufacturer Support:
- Consult the user manual provided by the manufacturer for specific troubleshooting steps and guidance. If the issue persists, contact the manufacturer's technical support for further assistance. They can provide specific troubleshooting advice or arrange for a technician to diagnose and repair the powder shaker if needed.

It's important to note that the specific troubleshooting steps may vary depending on the make and model of the powder shaker. Always refer to the user manual and follow the manufacturer's instructions for troubleshooting and maintenance.

kenteer has launched DTF Powder Shaker for customers . If you have any needs, you can contact us for a quote.

Congratulations to Mr. Christopher, KENTEER's exclusive distributor in Nigeria!

Congratulations to Mr. Christopher for becoming the exclusive distributor of KENTEER (Xiamen Kenteer New Material Science And Technology Co., Ltd.) in Nigeria.

distributor in Nigeria

We are delighted to highlight our long-standing partnership with Mr. Christopher, a valued customer from Nigeria. Since 2016, Mr. Christopher has been collaborating with KENTEER, primarily specializing in the sales of HTV machines and related products.

distributor in Nigeria

Over the past three days, from November 1st, we had the privilege of hosting Mr. Christopher at our company, where he visited our showroom and factory. During this time, we engaged in productive discussions regarding the suitability of our distributorship cooperation. We are thrilled to announce that we have successfully reached a strategic cooperation agreement.

distributor in Nigeria

distributor in Nigeria

Looking forward, we are excited to expand our collaboration and offer a comprehensive range of printing and cutting materials, equipment, inks, and chemicals to the Nigerian market.

This partnership signifies a promising future, and we are dedicated to making it a resounding success.

distributor in Nigeria

distributor in Nigeria

KENTEER—Your Printing & Cutting Material Supplier.

Digital Sublimation Printer Troubleshooting: Resolving Image Distortion and Banding Issues

When encountering image distortion and banding issues with a digital sublimation printer, there are several troubleshooting steps you can take to resolve these problems. Here's a guide to help you:

Digital Sublimation Printer

1. Check Design and File Resolution:
- Ensure that your design file has the appropriate resolution for printing. Low-resolution images can result in pixelation and image distortion. Aim for a resolution of at least 300 DPI (dots per inch) for optimal print quality.

2. Printhead Alignment:
- Perform a printhead alignment or calibration procedure as recommended by the printer manufacturer. Misaligned printheads can cause image distortion and banding. Consult the printer's user manual for instructions on how to perform this alignment process.

3. Ink Supply and Cartridges:
- Ensure that there is enough ink in the cartridges and that they are properly installed. Low ink levels or improperly installed cartridges can lead to inconsistent ink flow and result in image distortion and banding. Replace or refill ink cartridges as needed.

4. Print Speed and Print Quality Settings:
- Adjust the print speed and print quality settings in the printer software or RIP (Raster Image Processor) to find the optimal balance between speed and quality. Extremely high print speeds may cause image distortion, while excessively high print quality settings can lead to banding. Experiment with different settings to find the best combination for your specific printing needs.

5. Printhead Cleaning:
- Run the printer's automated printhead cleaning cycle to clear any clogged nozzles or debris that may be causing image distortion or banding. If the automated cleaning does not resolve the issue, consult the printer's user manual for instructions on manual printhead cleaning procedures.

6. Sublimation Paper and Heat Press:
- Examine the sublimation paper you are using. Poor-quality or incompatible paper can cause image distortion and banding. Ensure that you are using sublimation paper that is suitable for your printer and the specific sublimation process you are using. Additionally, check the heat press settings to ensure proper heat and pressure application during the transfer process.

7. Software and Firmware Updates:
- Ensure that you have the latest software drivers and firmware updates for your printer. Outdated software or firmware can contribute to image distortion and banding issues. Visit the manufacturer's website to download and install any available updates.

If the troubleshooting steps mentioned above do not resolve the image distortion and banding issues, it is recommended to contact the printer manufacturer's technical support for further assistance. They can provide specific guidance and troubleshooting steps based on the model and make of your digital sublimation printer.

kenteer has launched Digital Sublimation Printer for customers . If you have any needs, you can contact us for a quote.

Troubleshooting Blank Pages: How to Fix Digital Sublimation Printer Not Printing Anything

When experiencing issues with a digital sublimation printer not printing anything, resulting in blank pages, there are several troubleshooting steps you can take to address the problem. Here's a guide to help you:

Digital Sublimation Printer

1. Check Ink Levels:
- Verify that there is enough ink in the cartridges. Low ink levels can prevent any printing from occurring. Refill or replace the cartridges as needed.

2. Printhead Cleaning:
- Run the printer's automated printhead cleaning cycle to clear any clogged nozzles or blockages that may be hindering ink flow. Consult the printer's user manual for instructions on how to perform this cleaning process.

3. Check Printhead Alignment:
- Ensure that the printhead is properly aligned. Misalignment can result in blank pages. Follow the printer manufacturer's instructions to perform a printhead alignment or calibration.

4. Paper Feed and Loading:
- Verify that the paper is correctly loaded into the printer's paper tray or feed mechanism. Make sure the paper is properly aligned and not skewed. Adjust the paper guides if necessary to ensure a proper paper feed.

5. Paper Compatibility:
- Ensure that you are using the correct type and size of sublimation paper that is compatible with your printer. Using incompatible or low-quality paper can lead to printing issues, including blank pages. Refer to the printer's user manual for paper specifications and compatibility.

6. Check Print Settings:
- Verify that the print settings in your software or print driver are correctly configured. Make sure the correct paper size, print quality, and color settings are selected. Adjust the settings as necessary to ensure proper printing.

7. Software and Firmware Updates:
- Ensure that you have the latest software drivers and firmware updates for your printer. Outdated software or firmware can cause printing issues. Visit the manufacturer's website to download and install any available updates.

8. Check Connectivity:
- Ensure that the printer is properly connected to your computer or network. Check the cable connections for any loose or damaged connections. If using a network connection, ensure that the printer is connected to the correct network and has a stable connection.

If the troubleshooting steps mentioned above do not resolve the issue and the printer continues to produce blank pages, it is recommended to contact the printer manufacturer's technical support for further assistance. They can provide specific troubleshooting steps or arrange for a service technician to diagnose and repair the printer if necessary.

kenteer has launched Digital Sublimation Printer for customers . If you have any needs, you can contact us for a quote.

DTF Printer Cleaning Guide: Proper Techniques for Printhead and Printer Component Cleaning

Proper cleaning of the printhead and printer components is essential to maintain the performance and longevity of a DTF printer. Here is a general guide on the proper techniques for cleaning the printhead and other printer components:

DTF Printer

1. Printhead Cleaning:
- Turn off the printer and unplug it from the power source before starting any cleaning procedures.
- Refer to the printer's user manual for specific instructions on printhead cleaning and maintenance.
- Use lint-free, non-abrasive cloths or swabs and manufacturer-approved cleaning solutions for the printhead cleaning process.
- Gently wipe the printhead surface to remove any ink residue or debris. Be careful not to apply excessive pressure or damage the delicate components.
- Follow the recommended cleaning frequency and procedure provided by the printer manufacturer to ensure optimal printhead performance.

2. Wiper and Cleaning Station:
- Some DTF printers have a wiper and cleaning station that help remove excess ink and debris from the printhead.
- Regularly check and clean the wiper and cleaning station according to the printer's user manual.
- Use a lint-free cloth or swab with a cleaning solution recommended by the manufacturer to gently wipe the wiper blade and cleaning station.
- Avoid using excessive force or harsh cleaning agents that could damage or contaminate the printhead or other printer components.

3. Ink System and Tubes:
- Ensure that the ink system and tubes are clean and free from ink buildup or clogs.
- Follow the printer manufacturer's guidelines for routine cleaning of the ink system and tubes.
- Use manufacturer-approved cleaning solutions, if applicable, to flush the ink lines and remove any blockages or residue.
- Be cautious when handling and cleaning the ink system to avoid spills or leaks that could damage the printer or surrounding equipment.

4. Platen Cleaning:
- Clean the platen, which is the surface where the substrate is placed, to remove any ink or adhesive residue.
- Use a lint-free cloth or cleaning solution recommended by the printer manufacturer to wipe the platen gently.
- Avoid using abrasive materials or harsh chemicals that could scratch or damage the platen surface.

5. General Maintenance:
- In addition to regular cleaning, follow the manufacturer's recommended maintenance schedule for other printer components, such as rollers, motors, and belts.
- Keep the printer environment clean, free from dust, and properly ventilated to minimize the risk of contamination or overheating.
- Regularly inspect and clean the printer's exterior surfaces using a soft, lint-free cloth.

It's important to note that the specific cleaning procedures may vary depending on the DTF printer model and manufacturer. Always consult the printer's user manual or contact the manufacturer's support for detailed instructions and recommendations on cleaning and maintenance.

kenteer has launched DTF  Printer  for customers . If you have any needs, you can contact us for a quote.

Troubleshooting DTF Printer Ink Issues: How to Prevent Clogging and Color Mixing

When using a DTF printer, it's essential to troubleshoot ink issues such as clogging and color mixing to ensure optimal print quality. Here are some preventive measures and troubleshooting steps:

DTF Printer

Preventing Clogging and Color Mixing:
1. Quality Ink: Use high-quality, manufacturer-approved DTF ink that is specifically formulated for the printer. Inferior or incompatible inks can lead to clogging and color mixing issues.

2. Proper Storage: Store the ink in a cool and dry environment, away from direct sunlight, extreme temperatures, and humidity. Follow the manufacturer's recommendations for ink storage conditions.

3. Shake Ink Cartridges: Before installing ink cartridges, gently shake them to ensure proper mixing of the ink. This helps prevent settling or separation of pigments.

4. Regular Maintenance: Perform regular maintenance routines recommended by the printer manufacturer, such as automated cleaning cycles or manual cleaning procedures. This helps prevent ink buildup and clogging in the print heads.

Troubleshooting Clogging Issues:
1. Nozzle Check: Perform a nozzle check to identify any clogged nozzles. This test pattern shows if any ink channels are blocked or not firing properly.

2. Cleaning Cycle: Run the printer's automated cleaning cycle to clear clogged nozzles. This process usually involves flushing ink through the print heads to remove dried or stuck ink.

3. Manual Cleaning: If automated cleaning fails to resolve the clogging issue, consult the printer's user manual or contact the manufacturer for guidance on manual cleaning procedures. This may involve using specialized cleaning solutions, swabs, or other recommended tools.

Troubleshooting Color Mixing Issues:
1. Proper Ink Loading: Ensure that each ink color is correctly loaded into its designated cartridge. Incorrect placement can lead to color mixing during printing.

2. Purge and Test Prints: Before starting a new print job, purge the printer by printing a few test prints on scrap material. This helps clear any residual ink and ensures accurate color reproduction.

3. Color Calibration: Perform color calibration procedures as recommended by the printer manufacturer or software. This helps fine-tune color profiles and ensures accurate color output.

4. Ink Density and Saturation Settings: Adjust the ink density and saturation settings in the printer software or RIP (Raster Image Processor) to achieve the desired color intensity without causing color bleeding or mixing.

If troubleshooting steps do not resolve the ink issues, it is advisable to contact the printer manufacturer's technical support or consult a professional technician who specializes in DTF printers. They can provide further guidance or perform diagnostics to identify and resolve more complex ink-related problems.

kenteer has launched DTF  Printer  for customers . If you have any needs, you can contact us for a quote.